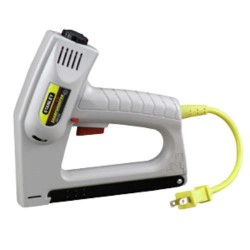
Stapling Sheet Vinyl Flooring
Installing sheet vinyl flooring can be a big pain in the ass, with first cutting out the template, cutting the vinyl, dealing with the goopy and stinky adhesive. Wasn’t sheet vinyl flooring supposed to be pain-free? Yes, it can be–when you staple the sheet vinyl instead of deal with adhesives.
Methods – From Hard to Easy
The catch here is that you must be installing the sheet vinyl on plywood underlayment. Obviously, if you’re installing on concrete slab, staples are not an option. From hard to easy:
- Adhesive only
- Adhesive plus staples
- Adhesive on perimeter only
- Staples only – perimeter
We’re just dealing with the last one.
Not Your Usual Stapler

Unfortunately, you won’t be able to use that spring-loaded stapler hanging in the garage. It’s not so much the vinyl flooring you have to content with; it’s the plywood. You won’t be able to drive staples into plywood with your manual stapler.
You need to either buy or rent a power stapler that can drive staples with a minimum 3/8″ length. Make sure that the staple can be fully driven in, without the top of the staple showing.
How to Staple Sheet Vinyl Flooring
Think that stapling down sheet vinyl is a no-brainer? Well, it pretty much is. But there are a few rules of procedure you’ll need to follow, else you end up with bulges.
- Make sure the sheet vinyl is completely smooth, with no bulges.
- Drive staples about 1/4″ from the edge of the vinyl.
- Occasionally, take your nose out of your work and make sure that the entire floor is staying smooth.
- Complete an entire wall.
- Next, staple the adjoining wall–not the opposite wall. Stapling the opposite wall will cause problems later on.