Making Curved Cuts In Ceramic Tile
Let’s be honest about it: making curved cuts in tile is not an easy thing to do. It is very time-intensive job, slow, frustrating, and the resultant product can often be ugly and unsatisfying. All that said, there is a bright lining in all of this.
Cut Tile Surface with Glass Cutter
Making curved cuts in tile is a two-step process. In the first step, you score a rough line with a glass cutter. The point is simply to dig out a rough line in the glazed surface of the tile which will help you cut a better line in your second step.
Tile Nipper to Nibble Away a Curve

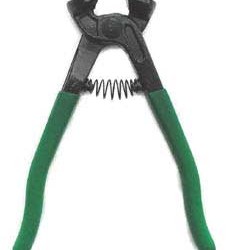
The second step involves a cheap tool called a tile nipper. A tile nipper is nothing more than a pair of glorified pliers with a dull cutting surface on each jaw. You slowly nibble away at the waste part of the tile curve until you reach the line that you scored with the glass cutter.
If you attempt to cut away too much, too fast, then you are unpleasantly rewarded with broken tiles. So you learn to nibble away fingernail-sized pieces of the tile and no more. Sometimes you go a little too far, sometimes too little. As long as you are close to the line, you’re “in like Flynn.”
I would say that, depending on the sleeve you will be inserting atop (explained later), you can get within 1/4” of the line and still be good.
But the saving grace in all of this is the fact that any kind of curve (really, any kind of cut at all that you make in tile, curved or straight) is subsequently covered by some type of other material. For example, when you cut straight edges in tile and install the tiles along the wall, those cut edges are later covered by baseboards.
In the case of curved cuts in tiles, most likely you will be installing these tiles around pipes. You will have a sleeve that will go around the pipe, and this sleeve will come down and cover up the ragged, curved edge of the tile.