Glueless Laminate Flooring – No Mess, Minimum Fuss
With glueless laminate flooring, you can have a hardwood look almost anywhere in your home – and with no mess, vapors, or finishing required. Using a tongue-and-groove configuration, laminate flooring is the leading alternative to solid wood floor installation today. Options for stone and ceramic flooring are available as well.
DIY Flooring
Less expensive than solid wood floors, glueless laminate flooring can easily be installed by do-it-yourself weekend warriors. Though it isn’t a bad idea to hire a professional; installing laminate flooring is one DIY project you may want to seriously consider. It might look daunting, but the flooring’s interlocking system is such that you could start building in an instant. For practice, simply start with a small area, such as an entryway, and then move onto an entire room.
Preparing the Subfloor
“Glueless” refers to the way laminate floors snap together, although you’ll rarely hear an audible snap–that’s just what it’s called.
The tongue-and-groove construction makes it easy to connect panels, at an angle or horizontally without damage. What’s more, glueless laminate flooring can be installed over any surface, aside from carpeting. If you have a carpeted room, you’ll need to pull up the entire carpet and prepare the subfloor beneath it.
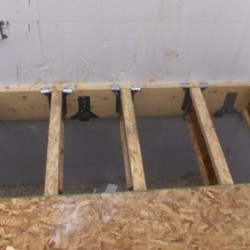
Preparing the subfloor is the most labor-intensive part of installing laminate flooring. The subfloor must be flat, minus bumps or slopes. Any “valleys” will need to be leveled out before proceeding with installation. The subfloor must also be clean of any dirt or debris. You wouldn’t want to trap it beneath the floor.
Also, if you hear of a “floating system,” it means that the laminate flooring isn’t connected to the subfloor. Essentially, it is an independent layer built on top of another. However, the tongue-and-groove system will keep it secure from movement, since it will be flush against the wall.
Note: If your flooring doesn’t already have it attached, you’ll need to place an underlayment beneath it – between it and the subfloor. This extra layer will help abate any noise resulting from the floating (that is, unattached) system.

Things to Remember
Installing laminate flooring is becoming an increasingly popular DIY project. Big-brand stores like Lowe’s and Home Depot all carry a wide selection of glueless laminate flooring. They also have experts there to guide you through the installation. You’ll also have your installation tool kit to help answer the most common consumer questions. You should be fine. Once you get started however, keep it mind a few things:
- The amount of prep required will depend on the type of floor you currently have.
- Accurate measurements are key to a successful project. You want to configure your flooring abstractly first.
- For floating systems, use an underlayment.
- Approx. 48 to 72 hours prior to installation, remove the panels from their boxes and lay them flat on the floor of the room that they’ll be installed in. This gives them a chance to acclimate to the environment; expand and contract until it settles according to the humidity and temperature.
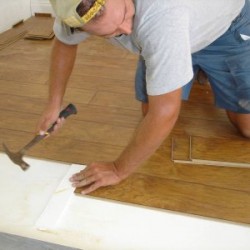
- Make sure you have a block of wood or other sturdy tool to tap the panels into place. This is the final assurance that the laminate flooring is properly aligned.
It’s as simple as that. If you follow the instructions provided by your hardwood store expert, as well as your installation tool kit, you should be well on your way to installing your very own DIY flooring.
