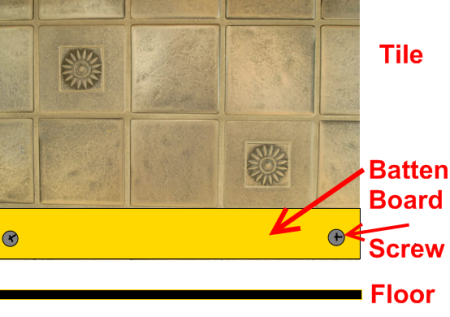
Batten Board for Installing Tile on Wall
First, the problem: you lay down a row of tiles on the wall. Nice, good. We’re happy. Uh oh…
You start to notice that the row is slipping downward. Sometimes, it’s not much, and it’s not always the entire row of tiles. While it may not seem bad, when you get that bottom row of tiles wrong, it becomes exponentially worse for the top rows. It seems to multiply. So, getting that first row right is essential.
No, you cannot just hold the tiles with your hand until they stick. You would be there forever. Instead, use a batten board for installing tile on wall:
Board placement? You’re leaving out that first (bottom) row of tiles on the wall, and replacing it with the board.
- Cut a 1×2 the length of the intended row of tiles.
- Screw the 1×2 onto the wall. Be sure to drill pilot holes first, because that 1×2 will crack. Top of the board goes where the top of the row was supposed to go.
- Then install the “second” row of tile atop that board. The board will prevent this “second” row from sliding down. Be sure that you don’t get a lot of mastic and crap under the board, or it will be hard to remove.
- Wait as long as humanly possible for the tile mastic to set (or as long as the directions say).
- Then, remove the board.
Who cares about the screw holes in the wall? We don’t. They get covered over by tile.
