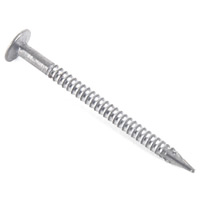
Nailing Underlayment
When nailing underlayment, you need to think about three things: nail type, nail size and nail spacing.
Sure, it may be tempting to grab just any old nail in your shop and start pounding away, but in the case the wages of sin are high: nails popping up through carpeting and even laminate floor; floor squeaking; and general homeowner misery. So, spend two minutes and get this one right. Getting the right kind of nail and spacing these nails correctly very much fits in with my idea of how to remodel.
Type of Nails
First, you’ll be using ring shank nails. Do not even think about using any other type of nail, because ring shank nails are designed to stay in place. Loose nails and wood-against-wood friction are the two main sources of floor squeaks.
But this goes beyond mere wood squeaks. You do want your floor securely fastened, don’t you? I thought so. Then use ring shank nails. Ring shank nails are perfectly designed for floor installation.
Size of Nails

Pick up packs of 3d ring shank nails. These are 1.25 inches long and can be used for underlayment that ranges up to 1/2 thick.
If you so happen to have thicker underlayment (3/4 inch or more), then use 4d ring shank nails. These are 1.5 inches long, plenty long to drive through that over-sized, over-thick underlayment.
Nail Spacing
Now, here’s the part that sucks. Nail spacing? You basically need to pepper that underlayment board everywhere, and by everywhere I mean:
- On the edge: 3 inches apart
- In the main area of the board: 6 inches apart
One saving grace of using those thicker underlayment panels (1/2 inch thick or more) is that you can cut the spacing in half. So, for example, edge spacing would be 6 inches apart, and so on.