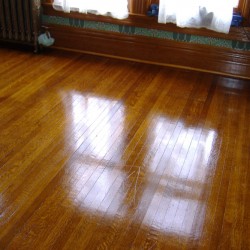
Shellac Floor Finish
Two things regarding floor finishes are somehow lodged in the popular mind, and they are: varnish and shellac. Here, we’re examining just one of them–shellac floor finish–and hopefully by the end of the article, we will have straightened you out.
In other words, shellac is a pain in the ass and I have no idea why anyone would considered using shellac as a floor finish.
Since the days of yore, when bugs were crushed up to make shellac, the paint and finishes industry has developed far better floor finishes than shellac. So, why not use them instead? But first let’s deal with shellac.
The Mush Factor
Shellac is a resin that comes from the female lac bug in S.E. Asia–the same resin that glazes the candy Skittles.
Shellac is alcohol-based, and even though this means it dries rapidly, this still complicates matters because dilution is a tricky process. Overly thick shellac applied to the flooring can form a shell-like surface that traps the alcohol base below. This gives the shellac an outwardly “dry” feeling, when in reality it’s a mushy mess below. Put your finger on it, step on it, or God forbid, set a paint or shellac can on it, and you have an indentation that lasts forever.
So, you’ll need to dilute your shellac; but unless you’re a pro at working with shellac, this is difficult to calibrate.
More Shellac Needed
Also, shellac is not a one-coat-does-all type of floor finish. After that first coat, you’ve got to basically roughen it up again with fine-grit sandpaper in the 300’s range. Then, wipe off the sanded shellac dust with tack cloth. Then reapply the shellac finish.
Are you done yet? No way. Do it all over again.
Three coats of shellac is the minimum. After that, you’ve got waxing to contend with, buffing, another waxing, and buffing again.
Shellac floor finish should be reserved for historic houses that demand this type of accuracy–not the average residential home.
